In the rapidly evolving blockchain industry, it’s crucial to keep up with the pace of change. Here’s a quick overview of how we seamlessly integrate new chains into the Mochi system, with the caveat that this method is specific to EVM-based blockchains:
- Product Preparation
- Pull raw data into clickhouse
- Ticker, Watchlist Token Info
- Wallet tracking on this new chain
- Show assets in profile
- Transfer / Tip / Airdrop / Payme / Paylink
- Withdraw
- Deposit
Product Preparation
In this section, most of the tasks require manual handling.
Add new chain to supported chain list
- Go to Mochi Pay repository.
- Create a migration file as show below.
INSERT INTO "public"."product_supported_chains" ("chain_id", "name", "symbol", "rpc", "explorer", "icon", "is_evm",) VALUES
('1', 'Ethereum Mainnet', 'ETH', 'https://eth.llamarpc.com', 'https://etherscan.io', 'https://cdn.discordapp.com/emojis/928216430451761172.png?size=240&quality=lossless', 't'),
- use the
/chainscommand to see the new changes.
Add token emojis
To enhance the aesthetics of Mochi, we aim to display token emojis whenever possible. Currently, please reach out to @minh_cloud for assistance with this task.
Pull raw data into clickhouse
To store blockchain raw events data in ClickHouse, follow these steps:
- Go to Infras repository and create a service with the following configuration, similar to the example
evm:
  chainName: base
  chainId: 8453
  rpcServers:
    - https://1rpc.io/base
    - https://base.meowrpc.com
    - https://mainnet.base.org
    - https://base.blockpi.network/v1/rpc/public
  syncFromBlockNumber: 2769582
- Verify Clickhouse Database Data
- Check the Clickhouse database to ensure it contains data for the new chains. Specifically, verify the
latest_block_timestamptable to confirm that it has the necessary records for the new chain. - Ensure that the
latest_block_timestampcolumn is up to date and reflects the latest block timestamp for the new chain.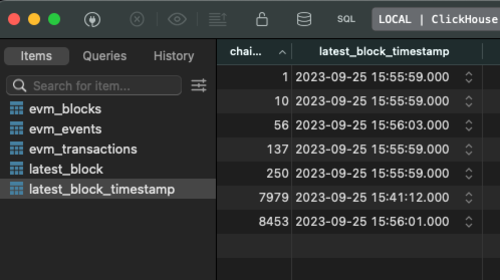
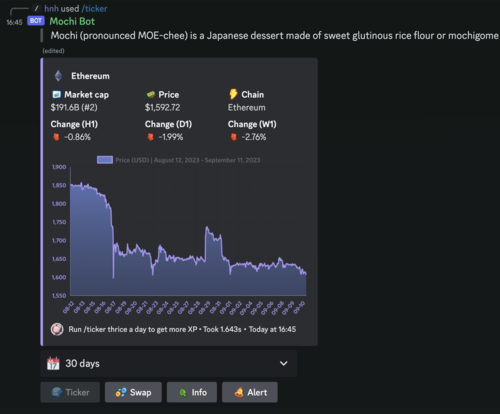
Ticker, watchlist and Token info
This step should work automatically. Simply go to Mochi Clients and test out some well-known tokens to ensure that everything is functioning as expected.
Wallet tracking
Wallet tracking is managed within the account-telemetry repository, follow these tasks:
Verify Clickhouse Database Data: should be done at step 1
Update
utilspackage:- Use any token of this chain to call Mochi API
api/v1/defi/custom-tokens?chain_id=%d&address=%sto see what is the key that represents the new block chain. Using this key to update in the next step. For Example, with the following response, the new chain is Optimistic, but the key that is provided by API is optimistic-ethereum, so we must use this key as the chain name. Because in some places, we need this key to detect token detail platform by chain id. TODO: rename these methods for compatible and readable.
map[string]response.TokenDetailPlatform{ "optimistic-ethereum": response.TokenDetailPlatform{ DecimalPlace: 18, ContractAddress: "0x9560e827af36c94d2ac33a39bce1fe78631088db", }, }- Update the
internal/util/chain.gofile to add support for the new chain. This involves adding the necessary configurations and logic to handle the data retrieval and notification process for the new chain. Currently, it is just a few utilities that are responsible for convert between chain ID, Name, etc.
For example: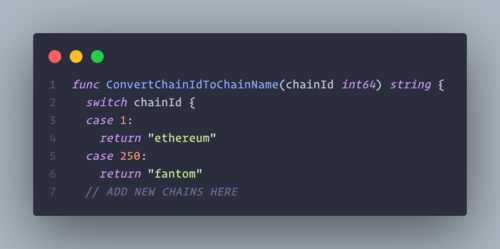
- Use any token of this chain to call Mochi API
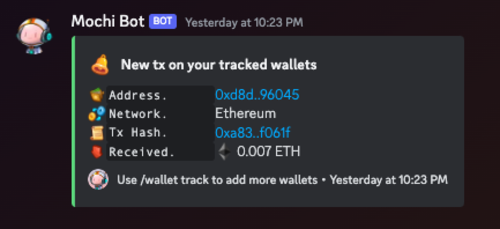
By completing these tasks, you’ll ensure that wallet tracking in the account-telemetry repository works seamlessly with the new chains, allowing for accurate notifications to users when their tracked accounts receive new transactions.
3. How to test
- In the Mochi Bot, use command
/wallet trackto track a specific wallet that owns by you on the new chain.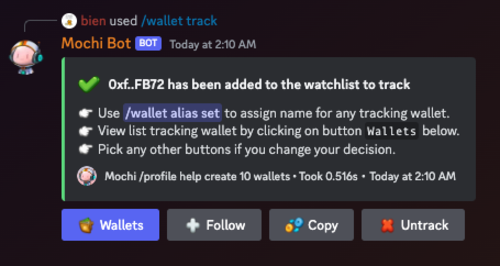
- Try transfer Native/ERC20 token from another wallet to above tracked wallet.
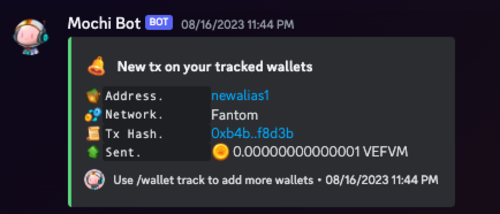
- Try transfer Native/ERC20 token from above tracked wallet to another wallet.
Show assets in Profile
NOTE: This is the primary step before doing any other below steps
In this part, it is essential to ensure that all widely-recognized tokens from the new chains are added to our database whitelist. To fulfill this requirement, we can follow these steps.
- mochi-pay-api:
- Write a database migration file to seed new chain’s info to the table
chains.
- Write script into above database miration file to seed tokens of new chain’s to the table
tokens- Find list listed tokens in the coingeko via this page https://www.coingecko.com/en/all-cryptocurrencies with proper filter. For Example: I’m searching token on the chain BASE.

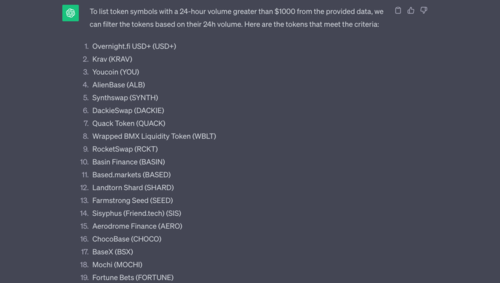
- Because we have no API to fetch these coin information, so we can do some cheat to extract list of expected token symbols like
[]string{"KRAV", "USDT" ...}to put into some Golang script to generate Database migration script for enriching tokens. For example I asked Chat GPT help me extract all symbol of all coins that have 24h Volume greater than $1000. Sometimes, result can be wrong, or not be a list of symbols, you can do some outstanding questions to optimize it.
- Using result of above script as list input tokens to generate file migration, check repository
mochi-pay-api at folder/scriptfor further information.
- Find list listed tokens in the coingeko via this page https://www.coingecko.com/en/all-cryptocurrencies with proper filter. For Example: I’m searching token on the chain BASE.
- Write a database migration file to seed new chain’s info to the table
- mochi-api:
- Update all utils at pkg/util folder to support the new chains, just simply add new switch case condition now. Such as in the
ConvertChainIdToChainNamewe must add new chain in the switch case and return proper chain’s name depend on providedchainId.
- Update all utils at pkg/util folder to support the new chains, just simply add new switch case condition now. Such as in the
How to test
- Firstly, you actually must deposit some tokens in the new integrated chain to your Mochi wallet by using the command
/deposit. - Then execute the command
/profileand/balto see the detail and ensure that new token is shown/counted in these command result.
Tip / Airdrop / Payme / Paylink
Everything must be done at step 4, except also need to update list chainIds in the function ListOrCreate of repository mochi-pay-api to support creating new inapp wallet that is used for transfer/deposit/withdraw in the Mochi.
How to test
/tip: make sure you can tip new token to others, balances of source and target is change./airdrop: same tip, need somebody help you collect the tip then check their balance to see the change./pay me: execute this cmd and make sure new wallet address for the new chain is generated in the option list, then try pay some token by using given url./pay link: execute this cmd and make sure you can claim token from given url.
Withdraw
This is actually done at step 4 and step 5. A token can be withdrawn when it is whitelist in the DB.
NOTE: You must faucet native token to the centralized wallet to pay for gas of withdraw transactions.
How to test
Try using cmd /withdraw and ensure that you give 2 following notifications:
- Withdraw submitted

- Withdraw success

Deposit
NOTE: You must faucet native token to the centralized wallet to pay for gas of sweeping native/token transactions.
To enable support for deposits on a new chain, follow these essential steps:
Compile and Deploy Deposit Contract:
- Compile the deposit contract using the contract available in the consolelabs/contract-tip-bot repository.
- Deploy the compiled deposit contract to the new chain. Ensure that the deployment is successful and that the contract is functioning as expected. Can testing on the testnet first.
Change Ownership to Centralized Wallet Address:
- Change the ownership of the deployed deposit contract to a centralized wallet address.
Seed Deposit Contract Information:
- Update the
mochi_pay_apiby adding information about the newly deployed deposit contract to thedeposit_contractstable. This includes details such as the contract address and other relevant information.
- Update the
Test Deposits:
- Perform testing to ensure that deposits work smoothly on the new chain. Test depositing a few tokens to verify that the deposit functionality is working as intended. Ensure that you got following notification and the balance is changed

- Perform testing to ensure that deposits work smoothly on the new chain. Test depositing a few tokens to verify that the deposit functionality is working as intended. Ensure that you got following notification and the balance is changed